Easy Elden Ring starter guide (2023)
If you follow our Elden Ring starter guide you can get levels faster. Some of the quests and explorations in the first minutes of Elden Ring can make the first minutes of the game much easier for you.
After release of Elden Ring, many gamers jumped into this unforgettable adventure in the vast lands. Since the general structure of Elden Ring gameplay is exploration-oriented, there are many features to discover and find from the very first minutes.
Some of the discoveries you will make and some of the features you will find can help you progress much more easily in the first part of the game. In Elden Ring Starter Guide, we will talk about some points that will make your job easier in the first minutes of the game.
Elden Ring starter guide: Don’t forget to do these things at the start
Once you choose your class and pass the first part, you will find yourself in a huge open world. We advise you to reach the Church of Elleh without dealing with the boss named Tree Sentinel in the first place. Get the crafting kit from Santa Claus here. This kit will allow you to craft important items according to the recipes you will find later.
Afterwards, you will need to open the map of the region from Gatefront Ruins and get the item from Melina that you can summon your mount named Torrent from the walls just above. Again, don’t forget to get the sword called Longsworn’s Greatsword behind the vehicle located just below this camp.
I can say that it is a heavy but powerful weapon in the early game. Once you have these, you will be able to navigate the open world, at least in the first area, much easier. Now let’s move on to the features that will make your job easier in these first parts.
Don’t skip the graveyards
In the first minutes of the game, in addition to farming to level up faster, it is also very important to collect Golden Runes in the graveyards on the playing field. You can collect a lot of them in every graveyard you come across. Whether you spend them immediately or save them for later is entirely up to you.
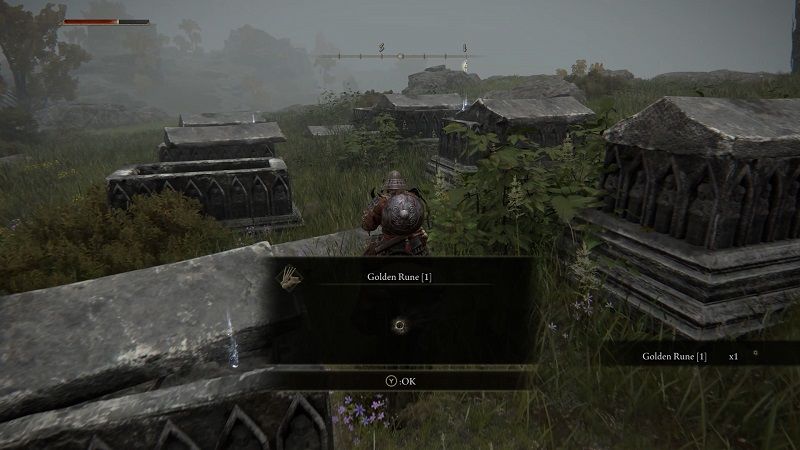
Flask Upgrade
In Elden Ring, the usege of Flask, which we can now set as health or mana, is also very important in battles depending on your class. Therefore, it is very important to upgrade it quickly. From the first part where you encounter Melina, quickly sprint upwards past Stormgate. When you reach Stormhill, pick up your first Golden Seed, which is sitting at the base of a small shiny tree.
You can now sit down at Lost Grace and make the necessary upgrade from the Flask boost. While you are here, go to the ruined hut marked on the map below and get the Stonesward Key. There is also an NPC in this hut. You can talk to him and get the Jellyfish Ashes spirit. This spirit is especially good at distracting bosses during boss fights.
By the way, after this stage, if you go to the church at the very beginning of the game at night (where the vendor is), you will meet Rena the Witch. From her you can get a new spirit called Wondering Nooble Ashes along with a bell to summon spirits.
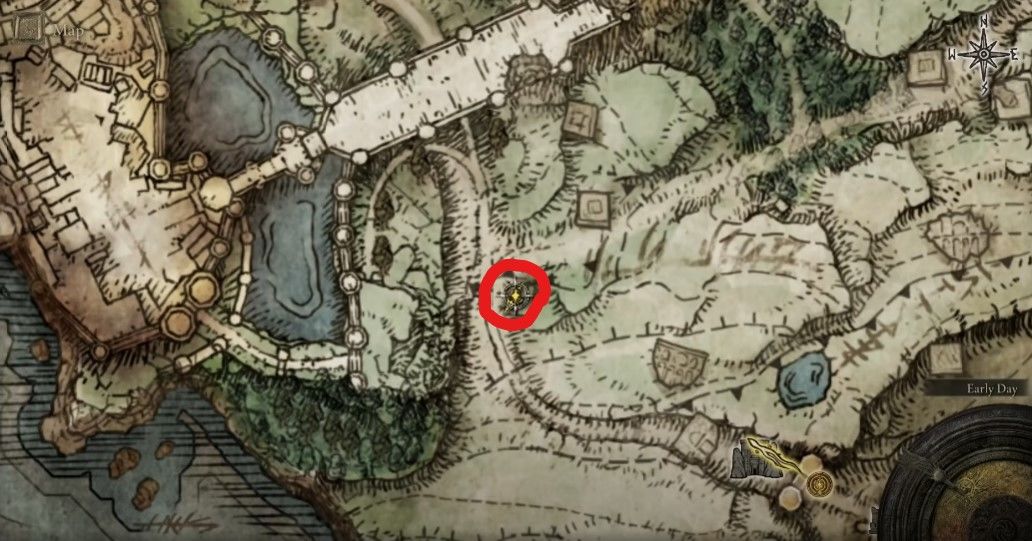
Continue upwards and turn right to the area with the giants. You will find the Strenght-knot Crystal tear in a large bowl near the cliff edge, which you can see on the map below. While you are here, don’t forget to tour the graveyard just below. As we mentioned at the beginning, you can get many Golden Rune here. Once you’ve scooped up the graveyard here, you can head back to the first area.
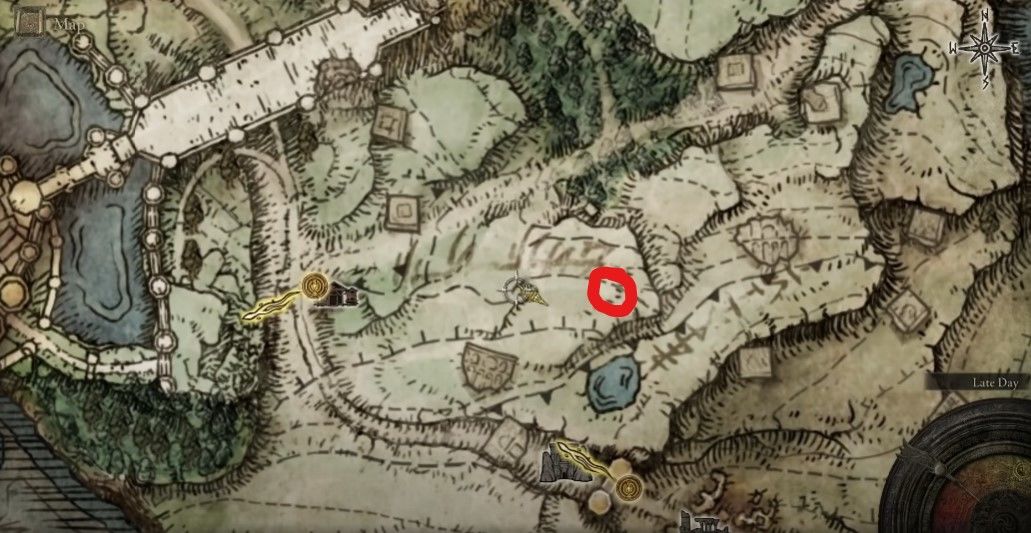
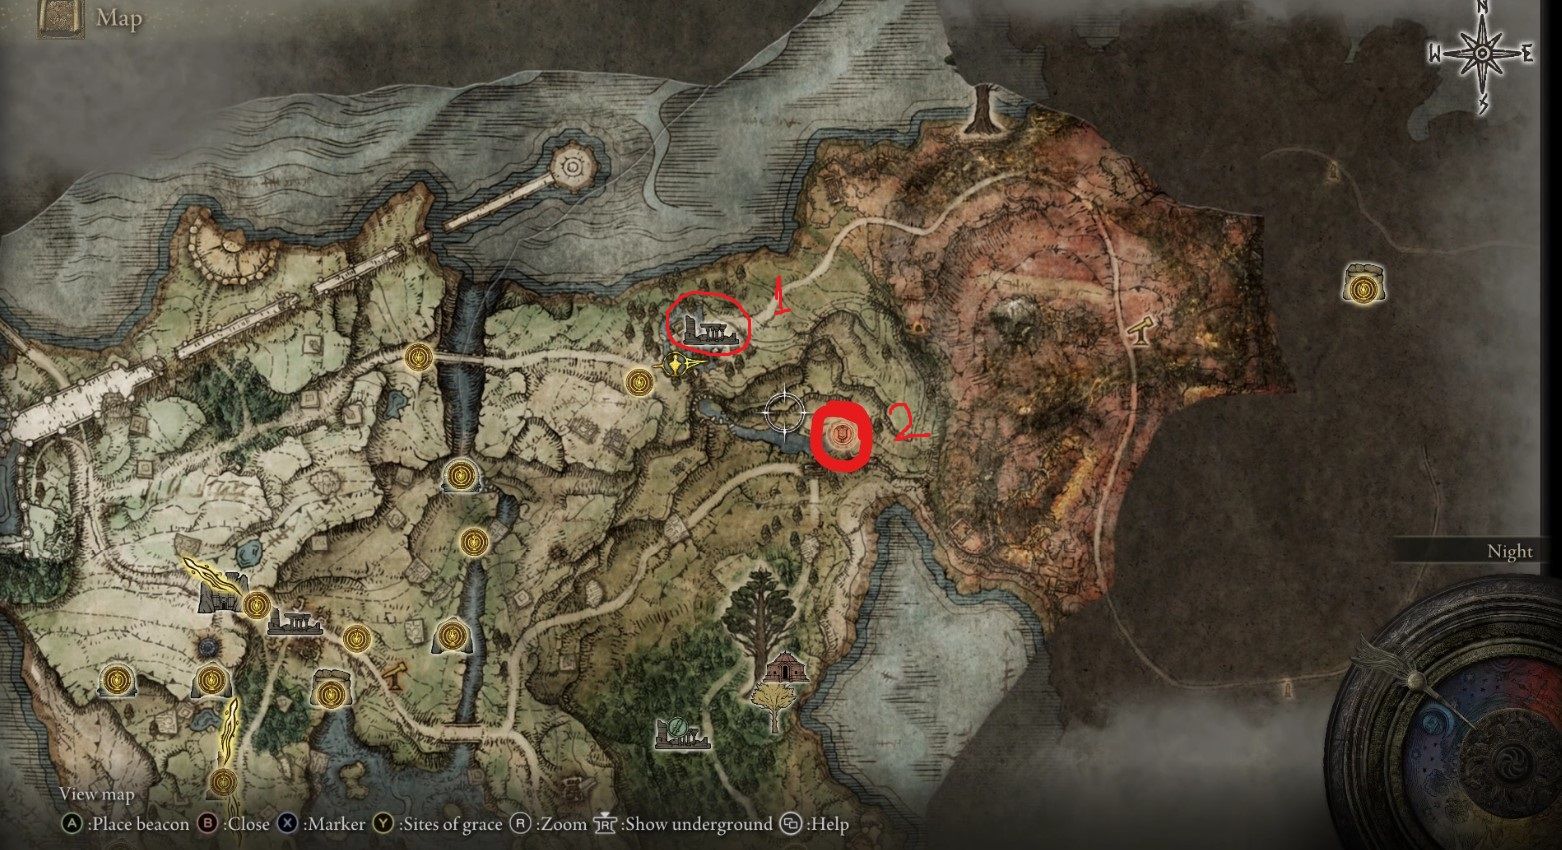
After returning to the first area, continue down Agheel Lake North. After picking up the Smithing Stone on the bridge here, head upwards at the road intersection. Skip the giant here and head to the Third Church of Marika at the end of the road. You can see this place on the map below in section 1.
When you enter the ruins of the church, take the Sacred Tear at the base of the statue (it will allow you to upgrade from the Flask) and the Flask of Wondrous Physick and Crimson Crystal Tear in the small pool just behind it.
Flasks and effects
- Cerulean Crystal Tear – Recover 50% FP
- Cerulean Hidden Tear – Gets rid of all FP consumption
- Crimson Bubble Tear – Restores HP when you’re about to die
- Crimson Crystal Tear – Restore 50% HP
- Crimsonburst Crystal Tear – Slowly heals HP
- Crimsonspill Crystal Tear – Increases maximum HP
- Crimsonwhorl Bubble Tear – Converts taken damage to Health
- Dexterity-knot Crystal Tear – Increases Dexterity
- Faith-knot Crystal Tear – Increases Faith
- Flame-Shrouded Cracked Tear – Increases Fire attacks
- Greenburst Crystal Tear – Increases stamina recovery
- Greenspill Crystal Tear – Maximum Boost Stamina
- Holy-Shrouding Cracked Tear – Increases Holy attack power
- Intelligence-knot Crystal Tear – Increases Intelligence
- Leaden Hard Tear – Increases Poise
- Lightning-Shrouded Cracked Tear – Increases the power of lightning assaults
- Magic-Shrouding Cracked Tear – Increases Magic attack power
- Opaline Bubble Tear – Significantly reduces damage on subsequent hits
- Opaline Hard Tear – Increases damage neutralisation
- Purifying Crystal Tear – Removes the curse of the Lord of Blood
- Ruptured Crystal Tear – After a brief pause, explodes
- Speckled Hard Tear – Increases resistances while also healing status
- Spiked Cracked Tear – Increases the effectiveness of charged strikes
- Stonebarb Cracked Tear – Hits more frequently break opponent postures
- Strength-knot Crystal Tear – Increases Strength
- Thorny Cracked Tear – Increases the number of sequential attacks
- Twiggy Broken Tear – Prevents rune loss while dying
- Winged Crystal Tear – Lightens the burden on the apparatus
Flask of Wondrous
Flask of Wondrous is one of the most important items in the game. It will be very useful especially in the first stage of the game. After you get it, when you sit in Lost Grace, you will see the Mix Wondrous Physick section open. When you enter here, a menu will open where you can mix two potions.
In other words, you can mix two different features in this Flask, such as giving an effect that increases your attack power while half filling your health. As you progress through the game, you will be able to combine potions with different effects.
Blood Slash feature for Ash of War
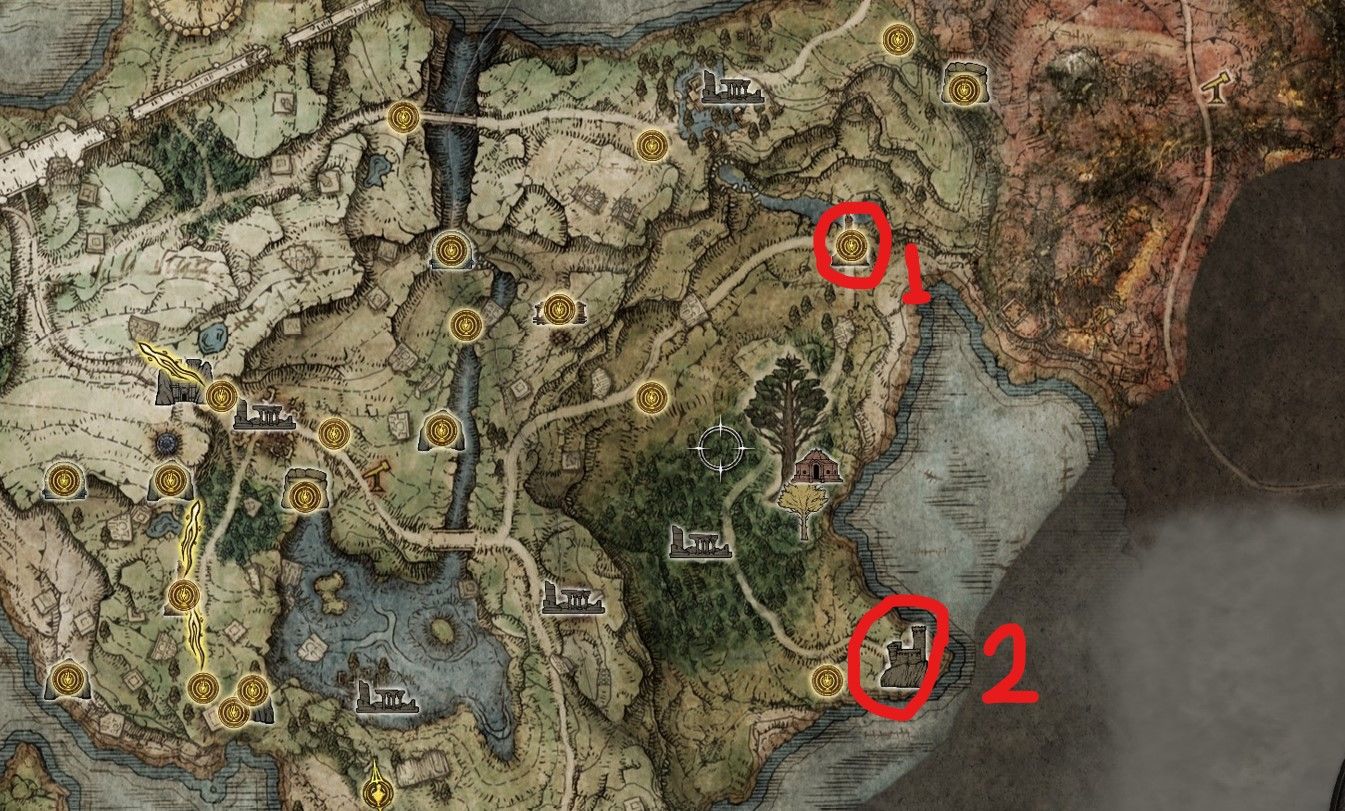
Ash of War is a very important element of the game’s combat system. I can say that a very effective feature awaits you in the early stages of the game. When you reach the castle number 2 on the map above, a mini boss fight awaits you at the top of the castle.
Don’t forget to get the Golden Seed from the shiny tree right by the door before going up to the castle. The boss is not hard to beat. When you defeat him, you can get the Blood Slash feature. On the way back, you will hear some conversations as you pass by the building in the image below.
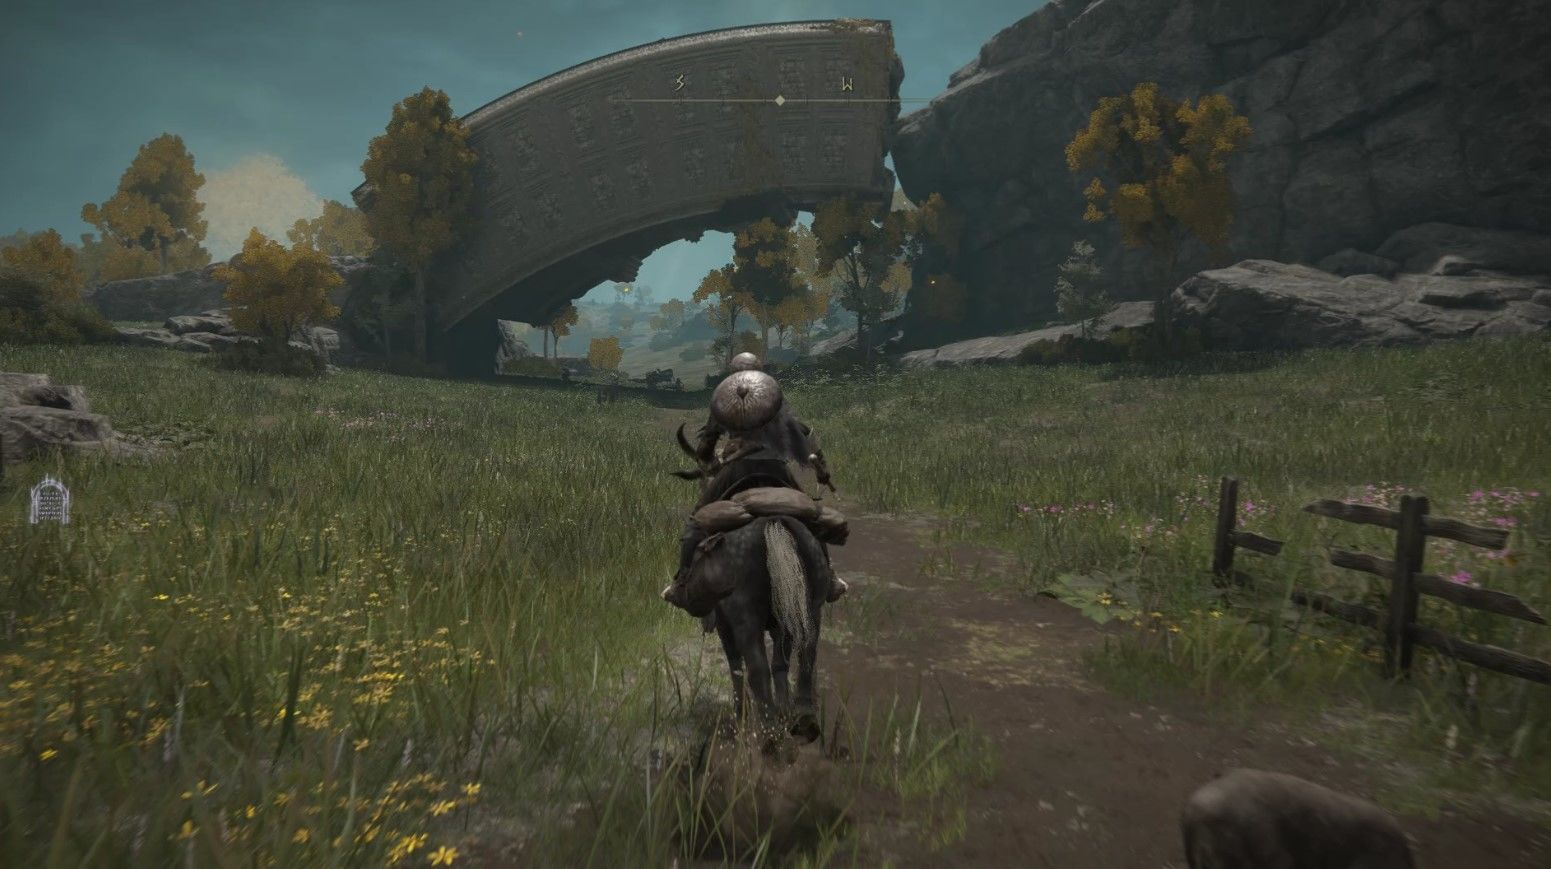
Stand on this structure and talk to the last member of one of the most noble families of Lands Between. He is actually the heir to the castle we just cleared. When you talk to him, he will ask for your help for this castle. Since you have already done this quest, you will receive the Erdsteel Dagger when you talk to him again.
Fast Rune Gain
In the beginning of the game, it is possible to collect runes faster. There is even a method that will give you 100,000 Rune when you get a little further past the early stages of the game.
In the map below, an NPC is waiting for you just above the ruins number 1. Talk to him and he will warn you about the ruins and tell you the location of a portal door that you need to go through if you want to get Deathroot. When you go to part 1, you will encounter a boss that you can easily pass, especially when you are on Torrent.
Read More: Elden Ring Runes Farming: Dupe Runes
After killing the boss, go to the area marked with the number 2 on the map below. You’ll find a portal. When you enter it, you will be able to teleport in a very far corner of the map. Here, if you wish, you can have a conversation with our brother in the castle. When you get out of the castle, walk right past the giant creature without touching it.
There are some little friends in this area that you can easily deal with, especially by going after it. Each of them gives 1.094 rune. So I can say that it is a good spot for farming. But be careful, if you don’t kill them stealthily, they will give you a single attack depending on your level.
Last tips
Finally, try to enter every dungeon in the first stage of the game. This will not only give you new items but also enough runes to level up. Stormfoot Catacombs and Groveside cave in the north are easy dungeons. You can also go down to Waypoint Ruins Cellar and find Sorcerer Sellen by beating the boss here. Especially if you are going to build magic, I can say that it is useful not to skip this.
Also, I recommend you to go to the north and clear the Castle Morne area before going to the story missions. It is easier here than in the north and you will find items like Sacred Tears.
And finally we are at the end of our Elden Ring Starter Guide. It is a game that contains many mysteries in its open world. Of course, there are dozens of different ways to find or discover weapons and armor.
In the Elden Ring Starter Guide, we mostly touched on the points you shouldn’t miss in farming and character items. What are the things you don’t miss in the early stages? You can share with us and of course with other players in the comments.

